Blush is having a moment.
For years, it was the step people skipped, or the one they used so lightly it barely showed. Now it’s everywhere. Liquid blushes go viral overnight. Placement trends come and go every few months. And makeup artists have brought back draping, the technique of blending blush up towards the temples to sculpt the face with colour.
But blush isn’t new, and the reason it works hasn’t changed. After foundation evens out your skin, blush brings back what it took away: warmth, life and dimension. It recreates the natural flush your skin has on its own, and it’s often the one step that makes a face look awake.
Like every other step, getting it right starts with the basics.
Formula
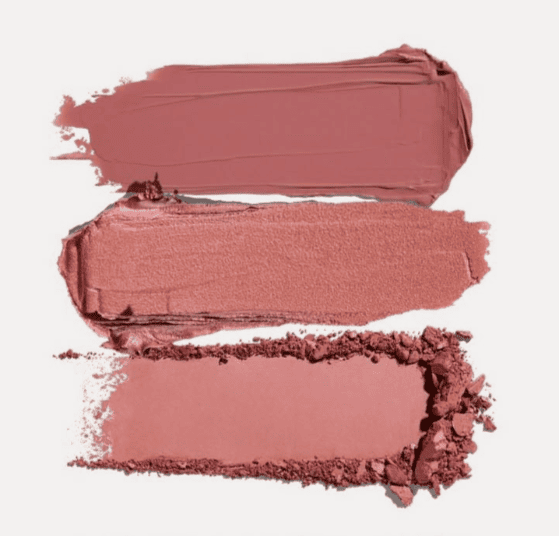
Blush comes in several formulas, and each one behaves differently on the skin.
- Powder blush is the most familiar. It’s easy to control, builds gradually and suits oily and combination skin particularly well, because it won’t add extra shine.
- Cream blush melts into the skin for a soft, natural, dewy finish. It suits dry and mature skin beautifully, as it won’t cling to texture the way powder can.
- Liquid blush is lightweight and often very pigmented, so a tiny amount goes a long way. It blends seamlessly and tends to last well.
- Gel and tint blushes give a sheer, natural flush that looks like it’s coming from within the skin. They set quickly, so work fast when blending.
- Stick blushes are cream blushes in a convenient format, easy to apply straight onto the skin and blend with your fingers.
Coverage and finish
Not all blushes carry the same amount of colour.
Some are sheer, building up gradually, which makes them forgiving for beginners and for lighter skin tones. Others are highly pigmented, so you need far less than you’d think. With a pigmented blush, start with the smallest amount and build up, because it’s much easier to add colour than to take it away.
Finish matters too. Matte blushes give a soft, velvety flush and suit textured skin, as they won’t emphasise pores or bumps. Satin blushes have a subtle glow. And some blushes contain shimmer or sheen, adding a hint of highlight at the same time as colour. They’re lovely on smooth skin, but shimmer can draw attention to texture, so use them with care if that’s a concern.
Choosing a formula that works with your base
This is where blush often goes wrong. Choosing a blush doesn’t just depend on your skin. It depends on what’s underneath it.
The simplest rule is to layer wet on wet, dry on dry.
Cream, liquid and gel blushes blend best over liquid or cream foundation, before you set your face with powder. Powder blushes go on after powder.
When a cream or liquid blush goes on top of powder, it can drag, lift your foundation and look patchy. And when a powder blush goes on top of unset liquid foundation, it can cling and look blotchy. Getting the order right makes almost any blush easier to blend.
Your application preference matters too. If you love using your fingers, creams and liquids will feel most natural. If you prefer a brush, powders are easier to control.
Colour
This is where blush becomes personal. There are three things to consider: depth, colour and undertone.
Depth is the most important, and the most often overlooked. Fair and light skin tones tend to suit softer, lighter shades, which look natural rather than stark. Deeper skin tones need deeper, richer, more intensely pigmented shades. A pale pink that looks lovely on fair skin can look chalky or ashy on deep skin, while a rich berry or brick shade that glows on deep skin can look heavy on fair skin.
Colour and undertone work together. As a general guide:
- Cool undertones often suit pinks, roses and berries.
- Warm undertones often suit peaches, corals, apricots and terracottas.
- Neutral undertones can usually wear a little of both, with soft rose and mauve shades working especially well.
A lovely way to find your most natural shade is to notice the colour your cheeks turn after exercise, or when you’re warm. A blush close to that colour will look like your own flush, only better.
And remember, these are guides, not rules. Blush is one of the most playful parts of makeup, and part of the joy is experimenting.
Application and placement
Where you place your blush can change your whole face, sometimes more than the colour itself.
- On the apples of the cheeks, the round part that lifts when you smile, blush gives a soft, youthful, fresh look.
- Along and above the cheekbones, blended upwards towards the temples, it creates a lifted, more sculpted effect.
- Draped, sweeping from the cheekbones up to the temples and even towards the brow, blush adds structure as well as colour. It’s a technique many makeup artists love.
- Across the cheeks and over the bridge of the nose, it gives a sun-kissed, just-back-from-holiday flush.
- A helpful rule: blush placed low on the face, below the level of the nose, can drag the face down. Keeping it on or above the cheekbone tends to lift.
Tools
- Fingers are ideal for cream and liquid blushes. The warmth of your skin helps them melt in naturally.
- A damp sponge gives the most seamless, sheer finish, and works well for pressing cream and liquid blush into the skin.
- A fluffy brush diffuses powder blush softly, for a natural finish.
- A denser brush gives a more concentrated, pigmented application.
Finding the balance
Blush is a balancing act.
On one hand, there’s blush blindness. If you’ve ever applied blush, looked away, and looked back to find it’s far stronger than you intended, you’re not alone. The longer you look at your face while applying colour, the more your eyes adjust to it, so it can start to look like you need more.
On the other hand, blush is also one of the first parts of your makeup to fade. It sits on the cheeks, where skin produces oil, where we touch our faces and where masks and scarves rub. By lunchtime, a flush that looked perfect in the morning can have almost disappeared.
So how much is right? A few things help:
- Build gradually, and step away from the mirror, or check in natural daylight, before adding another layer.
- Aim for longevity rather than intensity. Instead of simply applying more, layer a cream blush under a powder blush in a similar shade. It lasts far longer, without looking heavy.
- Choose long-wearing formulas if your blush tends to fade quickly. Liquid, gel and tint blushes often last longest, as they settle into the skin.
- Keep a powder blush with you for a quick top-up later in the day.
Advanced techniques
Once you’re comfortable with the basics, these are some of the techniques makeup artists love most.
- Layering cream and powder. Apply a cream blush first, then set it with a powder blush in a similar shade. It gives colour more depth and dimension, and helps it last all day.
- Mixing shades. Blending two blush colours together can create a more natural, multidimensional flush, or a shade that’s perfect for your skin tone.
- Monochromatic makeup. Using the same blush on your cheeks, eyelids and lips creates a soft, cohesive look, and it’s one of the easiest ways to look put together with very little effort.
Find your match
Powder blush
Best for oily and combination skin, and for anyone who prefers a brush. Apply after powder.
Cream blush
Best for dry and mature skin, and for a dewy, natural finish. Apply over foundation, before powder.
Liquid blush
Best for a long-lasting, seamless flush. Highly pigmented, so start with a tiny amount.
Gel or tint blush
Best for a sheer, natural, from-within glow. Work quickly, as it sets fast.
Stick blush
Best for ease and convenience, especially on the go. Blend with your fingers.
The short edit
The essentials:
Choose a blush formula to suit your skin and your base, a shade to suit your depth and undertone, and a placement to suit the look you want.
Ask yourself:
Am I putting cream blush on top of powder? Wet on wet, dry on dry makes almost any blush easier to blend.
Worth knowing:
Blush fades faster than almost any other step. Layer a cream blush under a powder blush for colour that lasts, rather than simply applying more.